Registrieren

In der Robotikentwicklung und in Forschungsprojekten ist die schnelle und zuverlässige Steuerung leistungsstarker bürstenloser Gelenkmotoren eine der wichtigsten Herausforderungen für Entwickler.
Dieses Tutorial zeigt Ihnen, wie Sie ein Arduino-Entwicklungsboard zusammen mit einem MCP2515 CAN-Modul verwenden, um den CubeMars AK45-36 Roboter-Gelenkmotor präzise über einen Joystick zu steuern.
Durch dieses Tutorial lernen Sie die Grundlagen der Hardwareverkabelung, die Konfiguration des MIT-Steuerungsmodus sowie die Implementierung der Steuerlogik kennen und können CubeMars Motoren einfach in Ihre Robotikprojekte integrieren.
Bevor Sie beginnen, stellen Sie bitte sicher, dass die folgenden Hardware- und Softwarekomponenten bereitstehen.
Hardware:
Arduino-Entwicklungsboard (z. B. Arduino Uno)
MCP2515 CAN-Modul
Zwei-Achsen-Joystick-Modul
DC-Netzteil und Jumper-Kabel
Software:
Arduino IDE
mcp_can Bibliothek (vorinstalliert)
Eine korrekte Verkabelung ist die Grundlage für eine stabile Kommunikation.
Konzentrieren Sie sich auf die folgenden drei wichtigen Verbindungspunkte:
MCP2515 und Arduino (SPI-Kommunikation): Verbinden Sie das MCP2515-Modul über die standardmäßige SPI-Schnittstelle (CS, SO, SI, SCK usw.) mit dem Arduino.
CAN-Bus-Verbindung (zum Motor): Verbinden Sie die CAN_H- und CAN_L-Pins des MCP2515-Moduls mit den entsprechenden CAN_H- und CAN_L-Leitungen des AK45-36 Motors.
Joystick und Stromversorgung: Verbinden Sie den X-Achsen-Signalausgang des Joysticks mit einem analogen Eingang des Arduino (z. B. A0). Schließen Sie anschließend den Motor an eine geeignete DC-Stromversorgung an.
Hinweis: Verwechseln oder vertauschen Sie niemals die Motorstromversorgung und die CAN-Signalleitungen.
Für dynamische Steuerungsanwendungen wie die Joystick-Nachführung empfehlen wir dringend die Verwendung des MIT-Steuerungsmodus.
Dieser Modus ermöglicht es, Positions-, Geschwindigkeits- und Drehmomentbefehle gleichzeitig innerhalb einer einzigen CAN-Nachricht zu übertragen und bietet dadurch eine extrem schnelle Reaktionszeit.
Konfigurationsschritte:
Verwenden Sie das offizielle CubeMars USB-CAN-Modul, um den Motor mit einem Computer zu verbinden, und öffnen Sie die obere Steuerungssoftware.
Stellen Sie die CAN-ID des Motors (z. B. 0x01) sowie die Baudrate ein.
(Diese muss mit dem Arduino-Code übereinstimmen, normalerweise 1 Mbps.) Klicken Sie auf „MIT Mode aktivieren“.
Nach erfolgreicher Konfiguration sollte beim manuellen Drehen der Motorwelle ein deutlich spürbarer Widerstand auftreten.
In der Arduino-Umgebung ist die Implementierung einer joystickbasierten Motorsteuerung einfach und besteht hauptsächlich aus drei Schritten:
1. Eingangswerte auslesen: Verwenden Sie einen analogen Eingang des Arduino (z. B. A0), um die Joystick-Werte in Echtzeit auszulesen.Der typische Wertebereich beträgt 0–1023.
Datenzuordnung (Mapping): Verwenden Sie eine Mapping-Funktion (z. B. map), um die ursprünglichen Joystick-Werte linear in den Zielpositions- oder Geschwindigkeitsbereich des AK45-36 Motors umzuwandeln.
CAN-Nachrichten senden: Verwenden Sie die CAN-Kommunikationsbibliothek, um die umgewandelten Zieldaten in ein Standard-CAN-Datenpaket des MIT-Modus zu verpacken und an die entsprechende CAN-ID des Motors zu senden.
Hinweis: Den vollständigen Arduino-Beispielcode, die Datenkonvertierungsfunktionen sowie die Kommunikationsprotokolle finden Sie in unserem offiziellen Download-Center.
Nach Abschluss der Konfiguration schalten Sie den Motor und Arduino ein.Bewegen Sie den Joystick. Die Motorwelle sollte sich entsprechend der Joystick-Bewegung gleichmäßig vorwärts und rückwärts drehen.
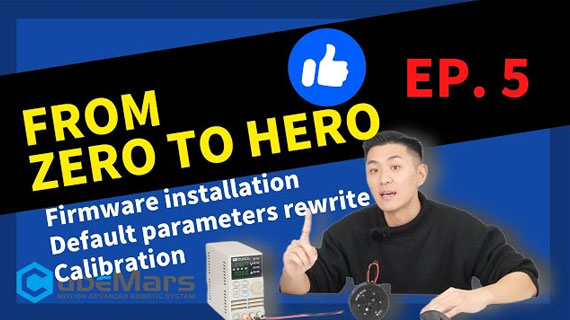
Sehen Sie sich das folgende Video an, um eine vollständige praktische Demonstration und detaillierte Erklärung zu erhalten.
Q1: Der Motor reagiert nach dem Einschalten nicht. Er dreht sich nicht beim Bewegen des Joysticks.
A:Bitte überprüfen Sie, ob der Motor erfolgreich den Enable-Befehl (Aktivierungsbefehl) empfangen hat.
Im MIT-Modus ist der Motor standardmäßig deaktiviert. Zuerst muss eine bestimmte CAN-Nachricht gesendet werden, um den Motor zu aktivieren, bevor er auf Steuerbefehle reagieren kann.
Q2: Der Motor vibriert oder reagiert verzögert während der Joystick-Steuerung.
A:Dies hängt normalerweise mit der Qualität der CAN-Bus-Kommunikation zusammen.Stellen Sie sicher, dass die CAN-Signalleitungen nicht parallel mit den Motorstromkabeln gebündelt werden.
Bei längeren Kommunikationsstrecken aktivieren Sie den 120Ω-Abschlusswiderstand über den DIP-Schalter am MCP2515-Modul.
Der AK45-36 ist nur ein Mitglied der leistungsstarken CubeMars Motorfamilie.Egal, ob Sie einen vierbeinigen Roboter, humanoiden Roboter, Roboterarm oder andere Robotikplattformen entwickeln – CubeMars bietet kompakte und leistungsstarke Aktuatorlösungen, die auf Ihre Anforderungen zugeschnitten sind.
[Mehr über die technischen Daten und Abmessungen des CubeMars AK45-36 erfahren]